■ JITHub 개발일지 59일차

□ TIL(Today I Learned) ::
DRF, 딥러닝_유화(Painting) 경매 댓글 기능 적용
- 유화 생성 후 경매 상세페이지 _ 댓글 기능
- 경매 상세페이지에는 다양한 기능들이 들어갔다.
☞ 포인트를 활용한 입찰, 입찰자 히스토리 보기, 경매 마감 남은 시간 등
- 이 중 댓글 생성/수정/삭제 기능을 구현했다.
- Back End를 먼저 구성하고 insomnia를 통해 잘 구성이 되었는지 확인하며 진행했다.
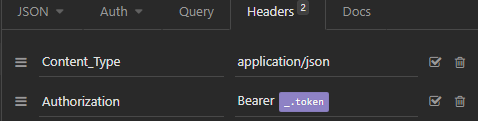
이 때 insomnia를 처음 사용해보면서 익숙하지 않아 어려움이 있었는데, 로그인 후 access token을 활용해 environment를 생성해주는데 아래와 같이 생성해주는 것을 모르고 한참 헤맸다. (이 것을 제외하곤 기존에 사용했던 postman과 유사한 점이 많아 잘 사용했다.)

- 아래는 insomnia를 활용해서 request를 관리하고 있는 모습이다.

- 위의 사진을 보면 알 수 있지만 댓글의 CRUD 기능은 GET,. POST, PUT, DEL을 모두 사용했다.
- 먼저 댓글 기능의 model은 가장 주된 부분이 content였다. 그리고 부수적으로 created_at, updated_at을 DateTimeField로 잡아주고, auto_now_add, auto_now를 각각 True로 만들어주었다.
- 여기서! 댓글은 작성자와 댓글이 달린 경매와 관계를 주어야 하므로 ForeignKey를 만들어주었고, 댓글을 만들었을 때 최신순으로 나열하기 위해 class Meta의 ordering을 ['-created_at']으로 지정했다.
class Comment(models.Model):
    content = models.TextField('내용', max_length=100)
    created_at = models.DateTimeField('생성 시간', auto_now_add=True)
    updated_at = models.DateTimeField('수정 시간', auto_now = True)

    user = models.ForeignKey(User, verbose_name='작성자', on_delete=models.CASCADE)
    auction = models.ForeignKey(Auction, verbose_name='경매 작품', on_delete=models.CASCADE, related_name="comment")

    class Meta:
        db_table = 'comment'
        ordering = ['-created_at']

    def __str__(self):
        return f'[작성자]{self.user}, [내용]{self.content}'
- 댓글기능의 url은 해당 게시글의 모든 댓글을 불러오는 url 하나, 그리고 특정 댓글을 가져오는 url 2개로 구성했다.
from django.urls import path

from . import views

urlpatterns = [
    ...

    # Auction Comment
    path('<int:auction_id>/comments/', views.CommentView.as_view(), name="comment_view"),
    path('<int:auction_id>/comments/<int:comment_id>/', views.CommentDetailView.as_view(), name="comment_detail_view"),
]
- VIEW에서는 좀 달랐다. url 구성할 때 어떻게 하면 쉽게 생각할 수 있을까 고민해보면, 어떤 id를 int값으로 가져와야하는지 생각해보는 것이었다.
1) auction_id만 가져와도 되는 경우 : 전체 댓글을 불러오기, 댓글을 생성하기
class CommentView(APIView):
    permission_classes = [IsAuthenticated]

    # 댓글 전체 조회
    @swagger_auto_schema(operation_summary="댓글 전체 조회",
                        responses={ 200 : '성공', 404:'찾을 수 없음', 500:'서버 에러'})
    def get(self, request, auction_id):
        auction = get_object_or_404(Auction, id=auction_id)
        comments = auction.comment.all()
        serializer = AuctionCommentSerializer(comments, many=True)
        return Response(serializer.data, status=status.HTTP_200_OK)

    # 댓글 생성
    @swagger_auto_schema(request_body=AuctionCommentCreateSerializer, operation_summary="댓글 생성",
                        responses={ 201 : '성공', 400:'인풋값 에러', 500:'서버 에러'})
    def post(self, request, auction_id):
        serializer = AuctionCommentCreateSerializer(data=request.data)
        if serializer.is_valid():
            serializer.save(user=request.user, auction_id=auction_id)
            return Response(serializer.data, status=status.HTTP_201_CREATED)
        return Response(serializer.errors, status=status.HTTP_400_BAD_REQUEST)
2) auction_id와 댓글 id를 모두 가져와야 하는 경우 : 댓글 수정하기, 댓글 삭제하기
class CommentDetailView(APIView):
    permission_classes = [IsAuthenticated]

    #댓글 조회
    @swagger_auto_schema(operation_summary="댓글 상세 조회",
                        responses={ 200 : '성공', 404:'찾을 수 없음', 500:'서버 에러'})
    def get(self, request, auction_id, comment_id):
        comment = get_object_or_404(Comment, auction_id=auction_id, id=comment_id)
        serializer = AuctionCommentSerializer(comment)
        return Response(serializer.data, status=status.HTTP_200_OK)

    #댓글 수정
    @swagger_auto_schema(request_body=AuctionCommentCreateSerializer, operation_summary="댓글 수정",
                        responses={ 200 : '성공', 400:'인풋값 에러', 403:'접근 권한 없음', 404:'찾을 수 없음', 500:'서버 에러'})
    def put(self, request, auction_id, comment_id):
        comment = get_object_or_404(Comment, id=comment_id)
        if request.user == comment.user:
            serializer = AuctionCommentCreateSerializer(comment, data=request.data)
            if serializer.is_valid():
                serializer.save(user=request.user, auction_id=auction_id)
                return Response(serializer.data, status=status.HTTP_200_OK)
            return Response(serializer.errors, status=status.HTTP_400_BAD_REQUEST)
        return Response({"message":"접근 권한 없음"}, status=status.HTTP_403_FORBIDDEN)

    # 댓글 삭제
    @swagger_auto_schema(operation_summary="댓글 삭제",
                        responses={ 200 : '성공', 403:'접근 권한 없음', 404:'찾을 수 없음', 500:'서버 에러'})
    def delete(self, request, auction_id, comment_id):
        comment= get_object_or_404(Comment, id=comment_id)
        if request.user == comment.user:
            comment.delete()
            return Response({"message":"댓글 삭제 완료"},status=status.HTTP_200_OK)
        return Response({"message":"접근 권한 없음"}, status=status.HTTP_403_FORBIDDEN)
- 위 두가지 view에서 사용한 serializer는 아래와 같다. 댓글의 model을 참고해보면 user와 auction은 foreign key를 통해 받아오고 있었고 댓글 생성시에도 필요한 필드이므로 SerializerMethodField로 생성했고, 프로필 사진 역시 생성해주기 위해서 동일하게 SerializerMethodField로 생성해주었다. 그리고 각각 필요한 정보들로 return해줄 수 있도록 각 함수를 만들어주었다.
#경매 댓글 serializer(상세, 리스트)
class AuctionCommentSerializer(serializers.ModelSerializer):
    user = serializers.SerializerMethodField()
    profile_image = serializers.SerializerMethodField()
    auction = serializers.SerializerMethodField()

    def get_user(self, obj):
        return obj.user.nickname

    def get_profile_image(self, obj):
        return obj.user.profile_image.url

    def get_auction(self, obj):
        return obj.auction.painting.title

    class Meta:
        model = Comment
        fields = ('id', 'user', 'profile_image', 'auction', 'content', 'created_at', 'updated_at', )

#경매 댓글 생성 serializer
class AuctionCommentCreateSerializer(serializers.ModelSerializer):
    class Meta:
        model = Comment
        fields = ('content',)
        extra_kwargs = {'content':{
                        'error_messages': {
                        'required':'내용을 입력해주세요.',
                        'blank':'내용을 입력해주세요.',}},}
- DRF는 자주 사용하면 Form이 굉장히 익숙해질 수 있을 것 같다. 아직은 익숙하지 못하지만 잘 사용한다면 개발시간을 많이 줄여줄 수 있을 듯하다.
- 댓글 기능을 진행할 때 가장 어려웠던 부분은 역시나 Frontend였다. 댓글을 불러올 때에는 Backend에서 여러 데이터를 Response에서 json으로 받아온 후 For반복문을 통해 넘겨주는 것으로 생각하고 있었다. 그런데 생각하고 있는 form에는 부차적인 문제들이 많았다.
- 일단, 댓글을 생성, 삭제는 아래와 같이 어려움 없이 구현했다.
// 댓글 생성
async function Create_Auction_Comment(){
    const content = document.getElementById("auction_comment_content").value

    const comment_data = {
        "content": content
    }
    const response3 = await fetch(`${backendBaseUrl}/auctions/${auction_id}/comments/`, {
        method : 'POST',
        headers: {
            Accept: "application/json",
            "Content-type": "application/json",
            "Authorization": "Bearer " + localStorage.getItem("access")
        },
        body : JSON.stringify(comment_data)
    })
    response_json3 = await response3.json()
    if (response3.status == 201) {
        alert("댓글이 등록되었습니다.")
        window.location.reload()
    } else if (response3.status == 400) {
        alert(response_json3["message"])
    } else {
        alert("로그인한 사용자만 이용할 수 있습니다")
    }
    }


// 댓글 삭제
async function deleteComment(comment_id){
    var delConfirm = confirm("정말 댓글을 삭제하시겠습니까?")
    if (delConfirm) {
    const response = await fetch(`${backendBaseUrl}/auctions/${auction_id}/comments/${comment_id}/`, {
        method: 'DELETE',
        headers: {
            Accept: "application/json",
            "Content-type": "application/json",
            "Authorization": "Bearer " + localStorage.getItem("access")
        },
    })
    response_json = await response.json
        if (response.status === 200) {
            alert("댓글이 삭제되었습니다.")
            window.location.reload()
            return response_json
        }
}}
- 문제는 댓글 불러오는 부분과 수정하는 부분이었다. 일단 댓글을 불러와서 html에 구성하기 위해서 특정 div에 'comment_box'라는 id를 부여했고, Backend에 GET을 통해 request하여 data를 가져오는데, url에서 갖고 있는 정보는 auction_id였고, 접속해 있는 특정 유저가 달았던 댓글에만 '수정', '삭제' 버튼을 나타내도록 하기 위해서 if문을 사용해야 했다. forEach를 통해 json 파일을 item이라는 인자를 활용하여 반복시켰는데, Backend에서 response가 어떻게 받아오는지 계속 console.log를 통해 확인해가면서 key를 찾아 불러와야 했다. 또! 수정 버튼을 누르면 그 자리에서 모달창을 띄우려고 했는데 javascript에서 띄우는 모달창의 스타일 attribute를 잘 몰라서 애먹었다. 결국에는 모달창이 아니라 그 자리에 있던 content의 display를 'none'으로 변경하고 새로운 textarea의 display를 'block'으로 지정하는 if문을 활용해서 해결했다. 그 함수는 아래와 같다.
function doDisplay(id){
    var con = document.getElementById("comment_content_2"+id);
    var con2 = document.getElementById("comment_content"+id);
    if(con.style.display=='none'){
        con.style.display = 'block';
        con2.style.display = 'none';
    }else{
        con.style.display = 'none';
        con2.style.display = 'block';
    }
}
- 나를 오랫동안 애먹였던 코드는 아래와 같다. 정말 javascript는 해결하면 재밌고, 그 전까지는 우주를 떠돌게 만든다. 그래도 결과물을 보면 잘 짰다는 생각이 들었다.
// 댓글 불러오기
async function loadComment() {
const response2 = await fetch(`${backendBaseUrl}/auctions/${auction_id}/comments/`, {
method: 'GET',
headers: {
Accept: "application/json",
"Content-type": "application/json",
"Authorization": "Bearer " + localStorage.getItem("access")
}
})
response_json2 = await response2.json()
var counts = Object.keys(response_json2).length
count_comments.innerText = counts
// user nickname 가져오기
payload_data = localStorage.getItem("payload")
payload_data = JSON.parse(payload_data)
user = payload_data.nickname
$('#comment_box').empty()
response_json2.forEach(item => {
let time_before = time2str((item['updated_at']))
if (user == item['user']) {
$('#comment_box').append(
`<ul class="comment-box-inner" style="height:100px;">
<li class="single-comment-box d-flex-between ">
<div class="inner d-flex-start" style="position:relative;">
<img class="avatar" src="${backendBaseUrl}${item['profile_image']}" alt="author">
<!-- End .avatar -->
<div class="content">
<h5 class="title">${item['user']}<span class="date-post"> ${time_before}   </span>
<div class="more-dropdown details-dropdown"><i class="ri-more-fill" data-bs-toggle="dropdown"></i>
<ul class="dropdown-menu dropdown-menu-dark">
<div id="container">
<button class="dropdown-item");" id="btn-modal${item['id']}" onclick=doDisplay(${item['id']})>Edit</button>
<p></p>
<a class="dropdown-item" onclick="deleteComment(${item['id']})">Delete</a>
</div>
</ul>
</div>
</h5>
<p id="comment_content${item['id']}">${item['content']}</p>
<div id="comment_content_2${item['id']}"class="content" style="display:none;width:1000px;">
<textarea name="message" cols="20" rows="1" id="auction_comment_content_update${item['id']}"style="width:50%;display:inline-block;">${item['content']}</textarea>
<div style="display:inline-block;vertical-align:middle;margin-bottom:50px;margin-left:50px;"><a class="btn btn-gradient btn btn-medium" onclick="updatecomment(${item['id']})"><span>수정</span></a></div>
</div>
</div>
</div>
</li>
<!-- End .single-comment-box -->
</ul></div>
<hr>`
)} else{
$('#comment_box').append(
`<ul class="comment-box-inner" style="height:100px;">
<li class="single-comment-box d-flex-between ">
<div class="inner d-flex-start">
<img class="avatar" src="${backendBaseUrl}${item['profile_image']}" alt="author">
<!-- End .avatar -->
<div class="content">
<h5 class="title">${item['user']}<span class="date-post">${time_before}  </span>
</h5>
<p id="comment_content">${item['content']}</p>
</div>
</div>
</li>
<!-- End .single-comment-box -->
</ul></div>
<hr>`)
}
});
}- 아래는 댓글을 수정시 기존의 댓글 내용을 가져오는 GET과 새로운 내용으로 덮어씌우기 위한 PUT 메서드의 코드이다.
// 댓글 수정 GET(특정 댓글 가져오기)
async function getComment(){
    const response = await fetch(`${backendBaseUrl}/auctions/${auction_id}/comments/${comment_id}/`, {
        method: 'GET',
        headers: {
            Accept: "application/json",
            "Content-type": "application/json",
            "Authorization": "Bearer " + localStorage.getItem("access")
            }
    }
    )
    response_json = await response.json()

    if (response.status == 200) {
        let CommentDetailInfo = response_json
        return CommentDetailInfo

    }else {
        alert(response_json["error"])
    }
}


// 댓글 수정 POST
async function updatecomment(comment_id){
    const content = document.getElementById('auction_comment_content_update'+comment_id).value
    const comment_data = {
        "content": content
    }
    const response = await fetch(`${backendBaseUrl}/auctions/${auction_id}/comments/${comment_id}/`, {
        method: 'PUT',
        headers: {
            Accept: "application/json",
            "Content-type": "application/json",
            "Authorization": "Bearer " + localStorage.getItem("access")
        },
        body : JSON.stringify(comment_data)
    })
    response_json = await response.json()

    if (response.status == 200) {
        alert ("댓글이 수정되었습니다.")
        location.reload();
        return response_json

    }else {
        alert(response_json["error"])
    }
}
- javascript를 하면서 알아두면 나중에 유용할 것 같은 코드들이 있었는데 아래와 같다.
1) 시간 포매팅
//시간 포맷팅
function time2str(date) {
    let today = new Date()
    let before = new Date(date)
    let time = (today - before) / 1000 / 60  // 분
    if (time < 60) {
        return parseInt(time) + "분 전"
    }
    time = time / 60  // 시간
    if (time < 24) {
        return parseInt(time) + "시간 전"
    }
    time = time / 24
    if (time < 7) {
        return parseInt(time) + "일 전"
    }
    return `${date.getFullYear()}년 ${date.getMonth() + 1}월 ${date.getDate()}일`
};
2) setAttribute를 활용한 댓글 생성 방식 (*이전 song recommend 프로젝트 참고)
async function handleComment(){

    const content = document.getElementById("comment-content").value
    console.log(content)

    if (content.Length == 0) {
        alert("댓글을 입력해주세요.")
    }else{

        const comment_content = await commentView(songId, content)
        const comment_detail = await CommentDetailView(commentId)
        const loadComments = document.getElementsByClassName("one-comment")[0]

        const newCommentLayout = document.createElement("div")
        newCommentLayout.setAttribute("style", "background-color:#0C101B;")
        loadComments.prepend(newCommentLayout)

        const newCommentUser = document.createElement("div")
        newCommentUser.setAttribute("class", "d-flex flex-row user-info")
        newCommentLayout.append(newCommentUser)

        const newCommentUserInfo = document.createElement("div")
        newCommentUserInfo.setAttribute("class", "d-flex flex-column justify-content-start ml-2")
        newCommentUser.append(newCommentUserInfo)

        //프로필이미지
        const newCommentUserImage = document.createElement("img")
        let profile_image = comment_detail[0]['profile_image']
        newCommentUserImage.setAttribute("src", `${backendBaseUrl}${profile_image}` )
        newCommentUserImage.setAttribute("class", "avatar avatar-md mr-3 mt-1" )
        newCommentUserInfo.append(newCommentUserImage)

        //유저닉네임
        const newCommentUserName = document.createElement("span")
        newCommentUserName.setAttribute("class", "d-block font-weight-bold name")
        newCommentUserName.innerText = comment_detail[0]['user']
        newCommentUserInfo.append(newCommentUserName)

        //댓글단 시간
        const newCommentTime = document.createElement("span")
        newCommentTime.setAttribute("class", "d-block font-weight name")

        let time_post = new Date(comment_detail[0]['created_at'])
        let time_before = time2str(time_post)

        newCommentTime.innerText = time_before
        newCommentUserInfo.append(newCommentTime)
        //댓글내용
        const newCommentArea = document.createElement("div")
        newCommentArea.setAttribute("class", "mt-2")
        newCommentLayout.append(newCommentArea)

        const newCommentText = document.createElement("p")
        newCommentText.setAttribute("class", "comment-text")
        newCommentText.innerText = comment_detail[0]['content']
        newCommentArea.append(newCommentText)

        //삭제 버튼
        if(comment_detail[0]['user'] == user_id['nickname'] ){
        const newDeleteBtn = document.createElement("button")
        newDeleteBtn.setAttribute("class", "s-24 text-primary icon-remove")
        newDeleteBtn.setAttribute("style", "background-color:#0C101B; border:none;")
        newDeleteBtn.setAttribute("id", comment_detail[0]['id'])
        newDeleteBtn.setAttribute("onclick", `deleteComment(this)`)
        newCommentUser.append(newDeleteBtn)


        //수정 버튼
        const newUpdateBtn = document.createElement("button")
        newUpdateBtn.setAttribute("class", "s-24 text-primary icon-exchange")
        newUpdateBtn.setAttribute("style", "background-color:#0C101B; border:none;")
        newUpdateBtn.setAttribute("id", comment_detail[0]['id'])
        newUpdateBtn.setAttribute("onclick", `updateComment(this)`)
        newCommentUser.append(newUpdateBtn)

    }
}}'DEV > Web 개발' 카테고리의 다른 글
| 딥러닝 :: 11월 넷째주 WIL13 (0) | 2022.11.29 |
|---|---|
| Web 개발 :: 딥러닝 이미지 처리(유화제작) 프로젝트 구현_TIL60 (0) | 2022.11.28 |
| Web 개발 :: 딥러닝 이미지 처리(유화제작) 프로젝트 구현_TIL58 (0) | 2022.11.28 |
| Web 개발 :: 딥러닝 이미지 처리(유화제작) 프로젝트 구현_TIL57 (0) | 2022.11.28 |
| Web 개발 :: 딥러닝 이미지 처리(유화제작) 프로젝트 구현_TIL56 (0) | 2022.11.23 |


댓글